Getting your first client is only half the battle. To retain them, you need to make sure they’re fully onboarded onto the GoHighLevel platform.
I’ve put together this guide, including essential elements required, to onboard your clients and set them up for success.
Key Takeaways:
- Live onboarding is recommended to answer questions and troubleshoot in real time
- To save time, ask for business information and user account access upfront
- Platform training and ongoing support must form part of the onboarding process
You’ve Landed a Client, Now What?

You got the notification: Your first client has landed. Pop the champagne!
Now the real work starts.
Onboarding is extremely important because it sets your business relationship off on the right foot. If your client feels well looked after and confident about the platform, they’ll be far more likely to stick with you for the long term.
Think about when you first used GoHighLevel. You probably felt like a fish out of water.
It isn’t the easiest platform to get the hang of, so imagine how your client feels in this respect.
Proper onboarding gets them set up correctly so there are fewer issues and problems. Plus, they can get going faster than if they had to figure it all out for themselves.
And by providing full training and support, you position yourself as a trusted partner who is invested in their success rather than simply a software vendor.
Don’t Rely on Email: Arrange a Live Onboarding Call
In my experience, emails are rarely read thoroughly, and they can easily get buried in people’s inboxes, meaning they’re missed entirely.
Plus, email isn’t a real-time communication channel, so it requires a lot of back-and-forth, which unnecessarily prolongs the onboarding process.
So, schedule live phone or video calls to conduct your onboarding process.
This one-to-one interaction will be more appreciated by your client, give them the opportunity to ask questions as they pop up, and reduce the risk of communication issues.
First, Ask Your Client for This Info

One of the first things you will need from your client is basic information about them and their business. This is what will allow you to get their sub-account set up and ready to go.
Ask for:
- Business name (friendly and legal)
- Business address
- First and last name of the client
- Client email address
- Business phone number
- Client time zone
- Default language
- EIN (Required for A2P registration if your client is based in the USA or Canada)
- CSV file of customer/client contact lists
Now, depending on what type of package or service you are selling, you might also need to ask for additional information:
- Business logo and brand assets
- Website domain with admin access to their domain registrar account
- Admin access to Facebook Business Manager
- Admin access to Google Ads Manager
- Logins for social media accounts
- Calendar availability (the days/times they can take appointments)
- First and last names and email addresses of anyone within the client’s business who also requires user access in GoHighLevel
9 Essential GoHighLevel Client Onboarding Tasks
Once you have the right information in hand, you can start the onboarding process.
1. Prepare the Sub-Account
First things first, set up the sub-account.
Now, this differs depending on which GoHighLevel plan you are subscribed to:
- If you use the SaaS configurator (Pro plan), GoHighLevel automatically creates the sub-account after the client has purchased a package.
- If you are on the Starter or Unlimited plan, you must manually create the sub-account.
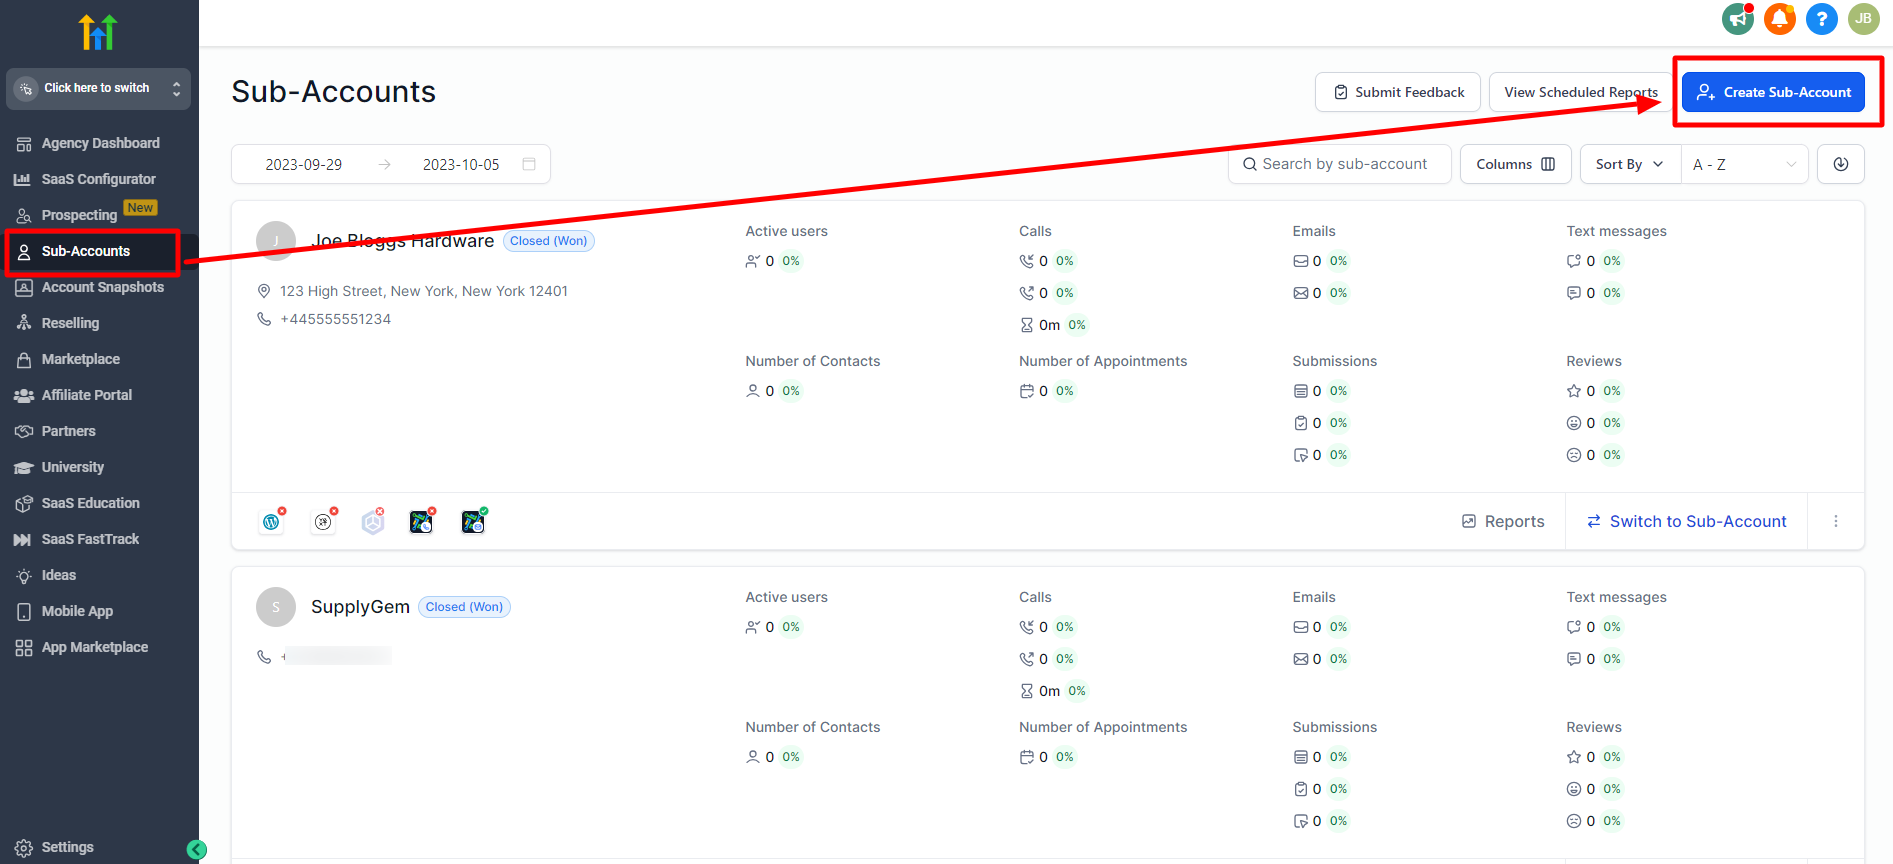
For manual sub-account creation, make sure you’re in Agency View. Head to Sub-Accounts and click to create a new one.
2. Fill Out the Client’s Business Profile and Preferences
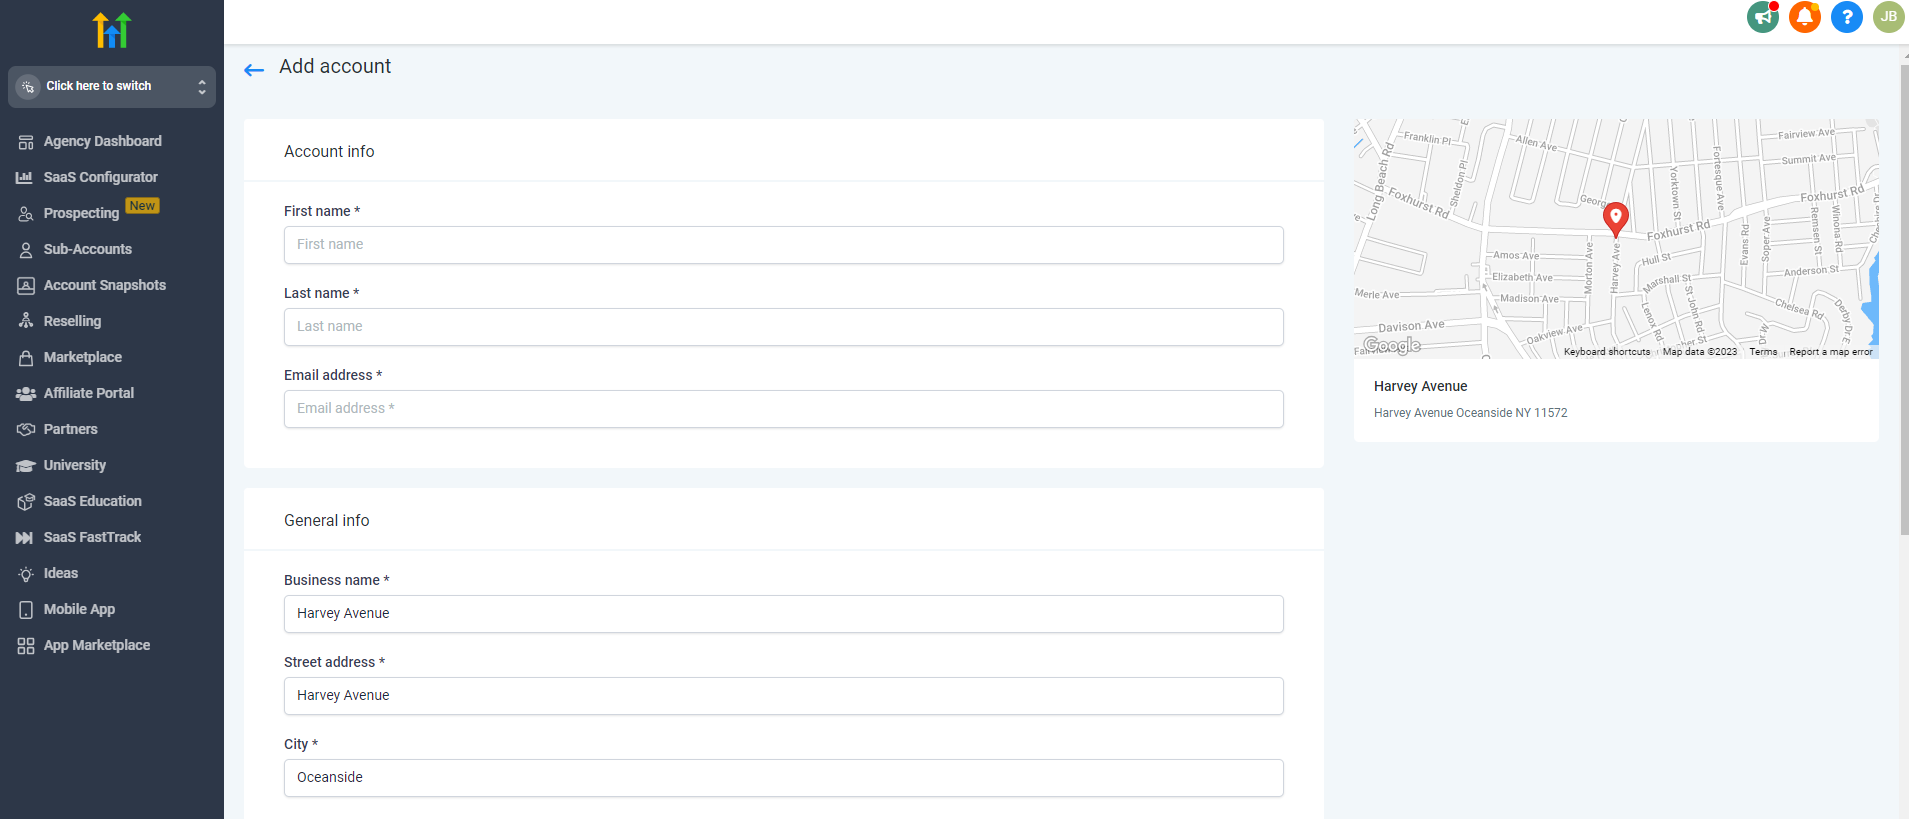
Once the sub-account has been created, you will be prompted to fill in the client’s information:
- Add their general information, such as business address, business name, client name, and email address.
- Set the right time zone and preferred language.
- Add their social media profiles.
- Set any usage limits for users and contacts according to the package they purchased (SaaS does this automatically).
- Add any rebilling or reselling options.
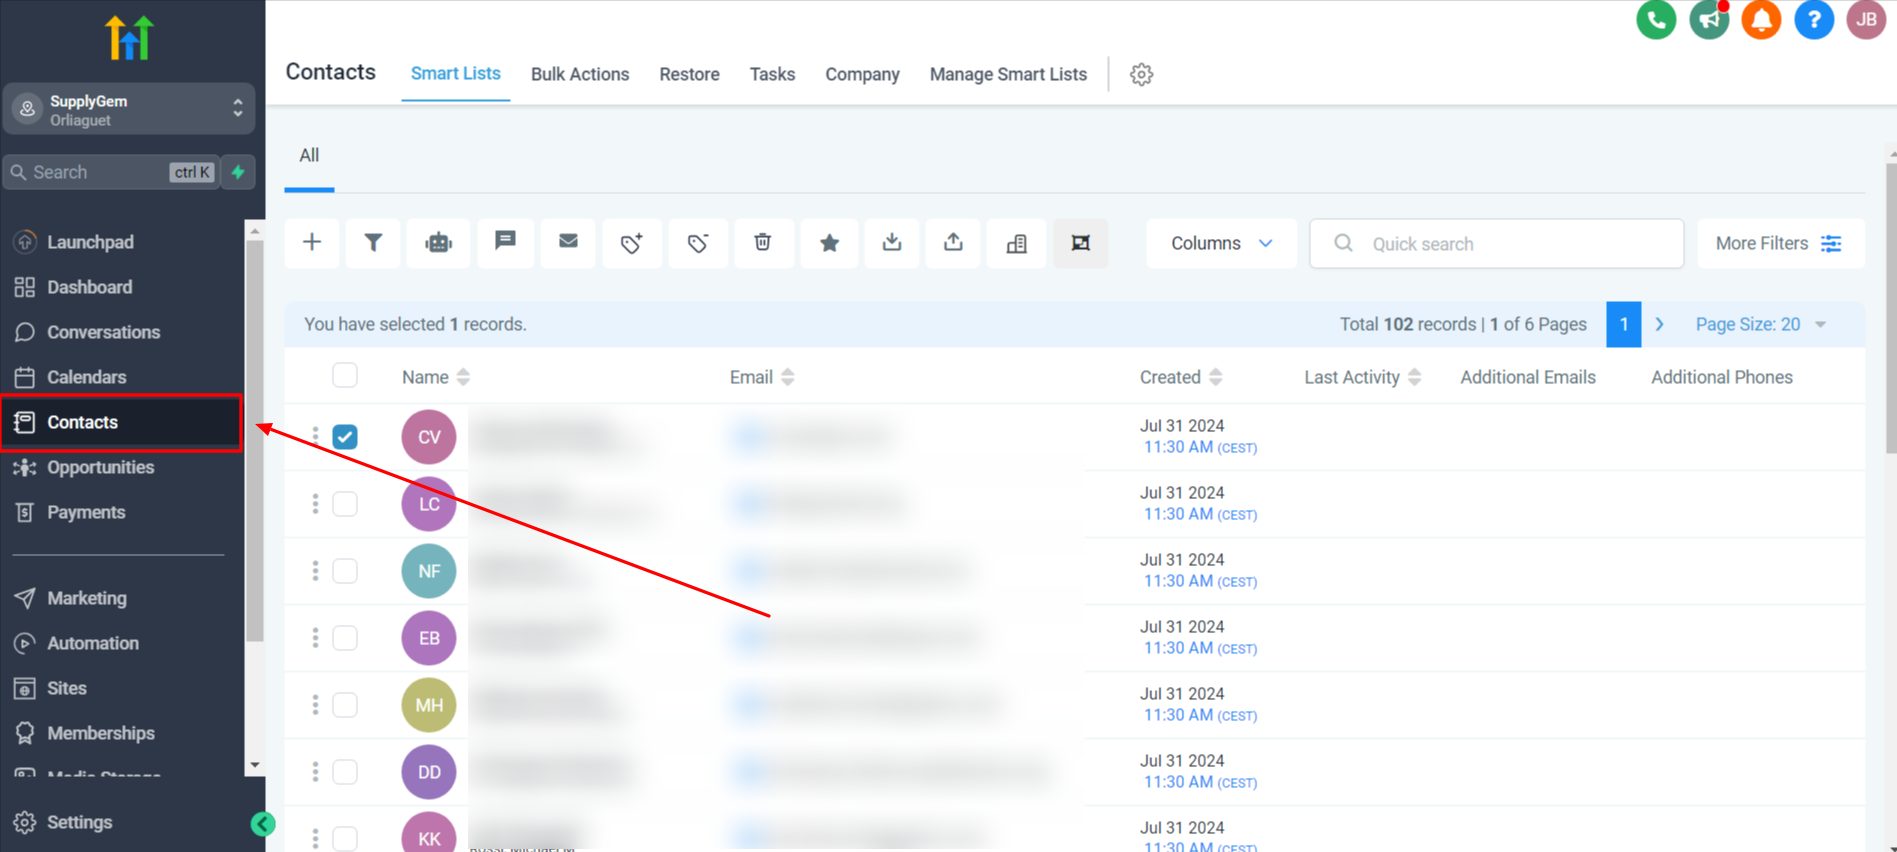
At this point, it’s also a good idea to import any CSV files of customer contacts the client has given you. You can do this by heading to the Contacts tab and uploading the CSV file.
3. Get the Client A2P Registered
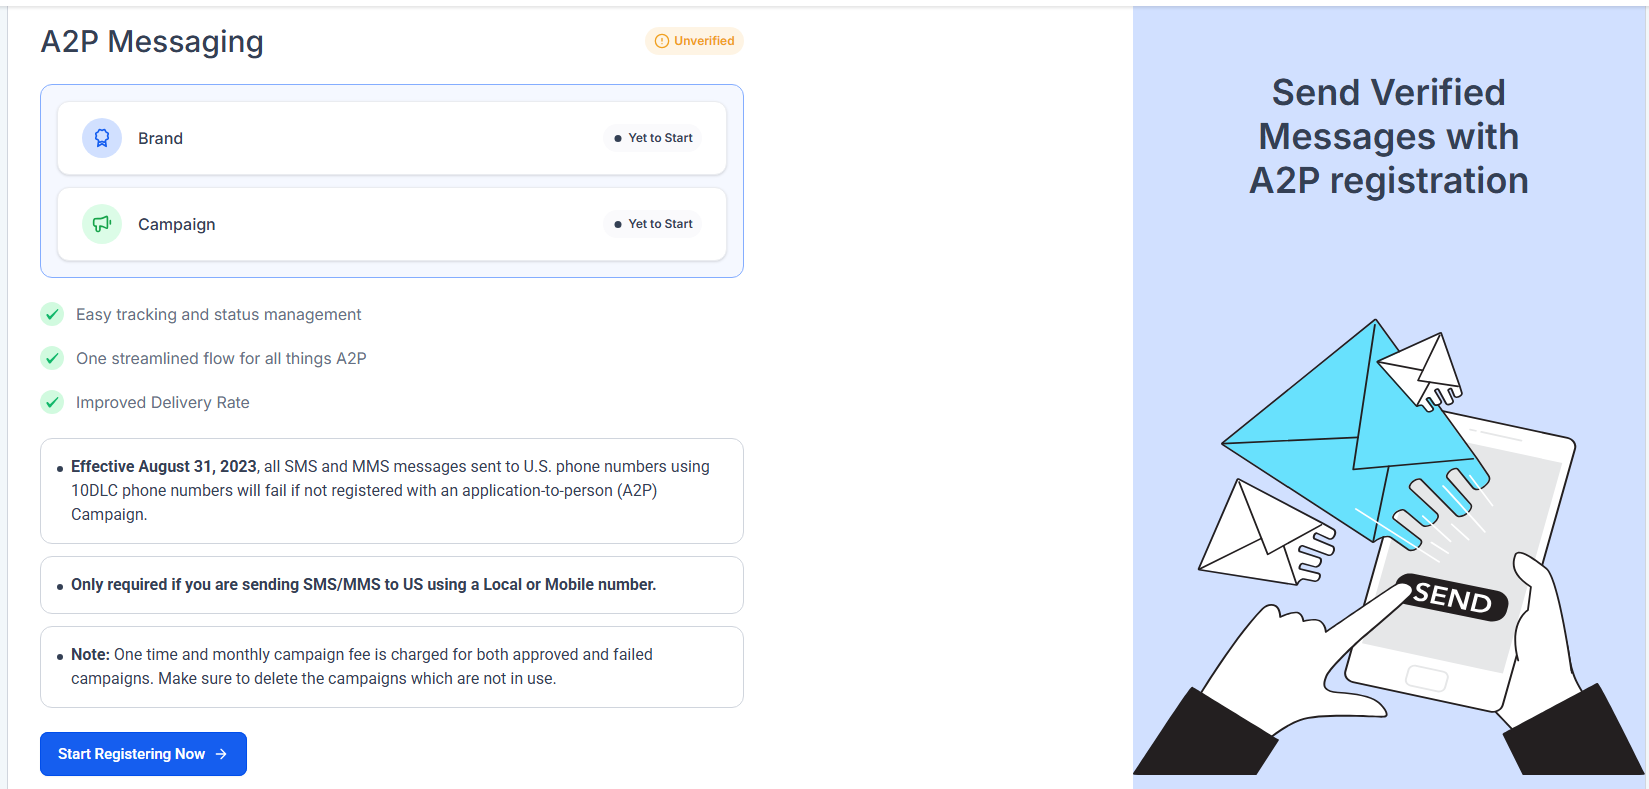
A2P is a requirement to ensure US and Canadian clients have a registered phone number to run SMS campaigns. To complete the process, you’ll need the client’s Employer Identification Number (EIN).
In their sub-account, head to Settings > Phone Numbers > Trust Center. Then, go through the setup process to complete the registration.
A couple of points:
- All details must exactly match the client’s business information. Any discrepancies will mean a rejection, so double-check everything to ensure the process goes smoothly.
- A2P registrations can take a while to be approved by the relevant authorities. Be sure to set expectations with your client upfront so they know to expect a delay.
Once A2P is registered and approved, you can purchase a phone number from GoHighLevel.
4. Set Up Phone Numbers, Domain, and Email
Phone Numbers
Purchasing a phone number will be necessary if your client wants to send/receive calls and SMS messages from within GoHighLevel.
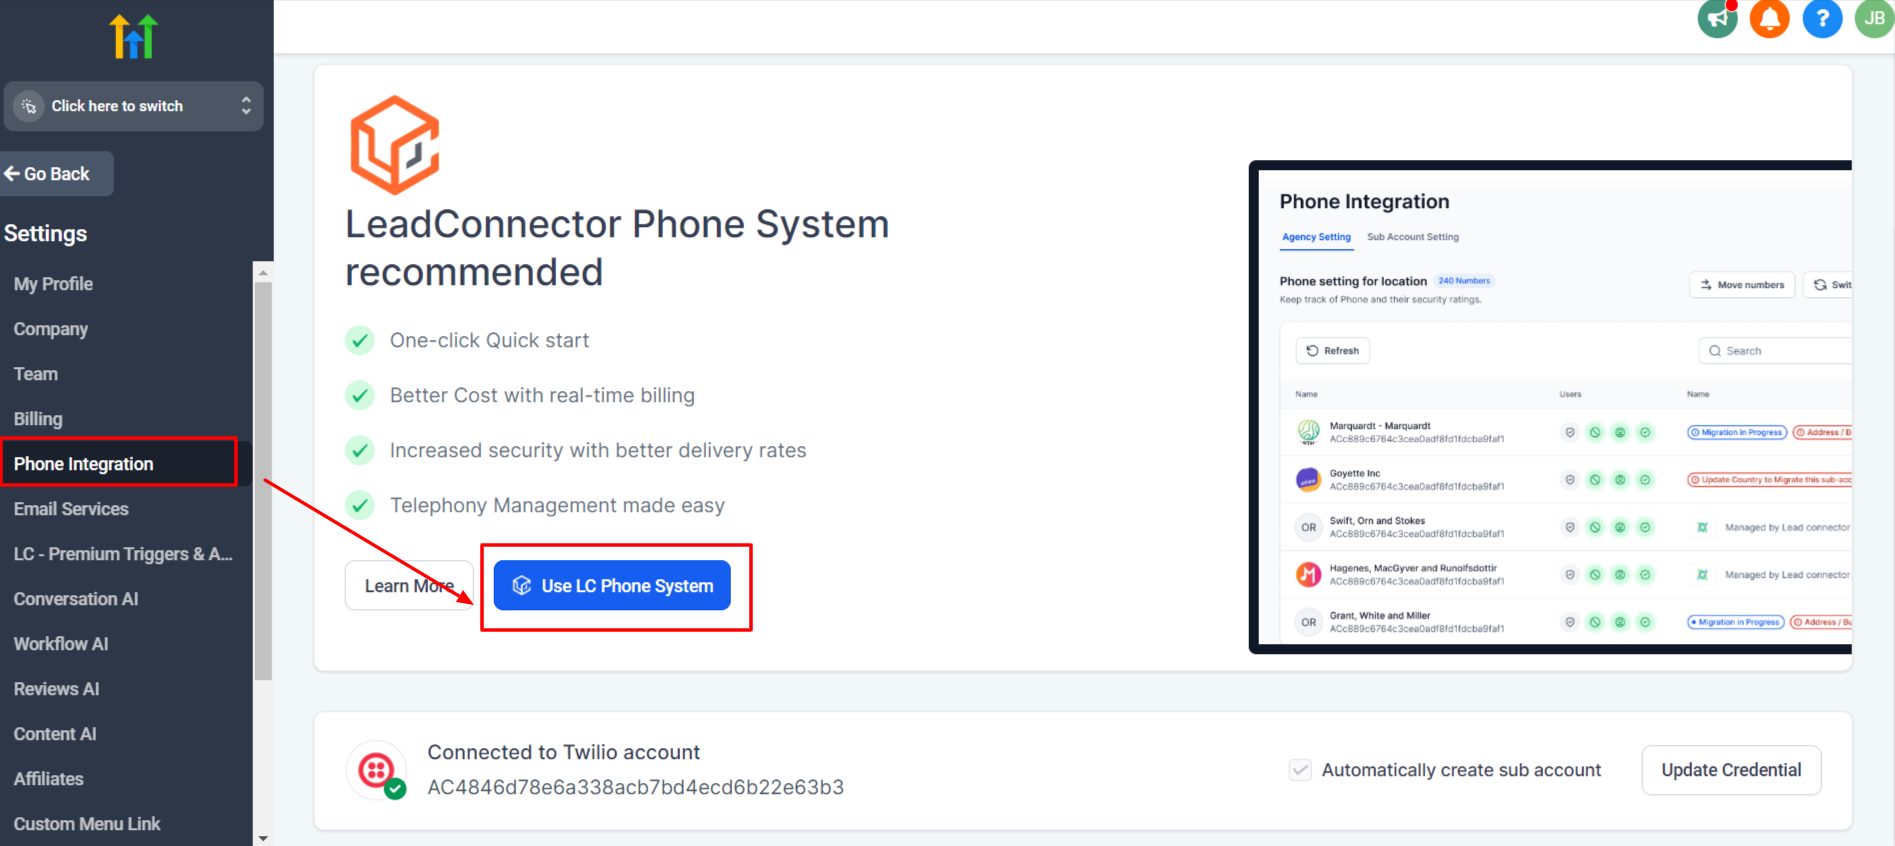
First, you will need to connect to GoHighLevel’s phone service provider (LC Phone system). Although you can use Twilio, I recommend LC Phone System because it’s much easier to set up.
To do this, click Settings > Phone Integration > Use LC Phone System.
Next, to add a phone number, hit Settings > Phone Numbers > Add Number.
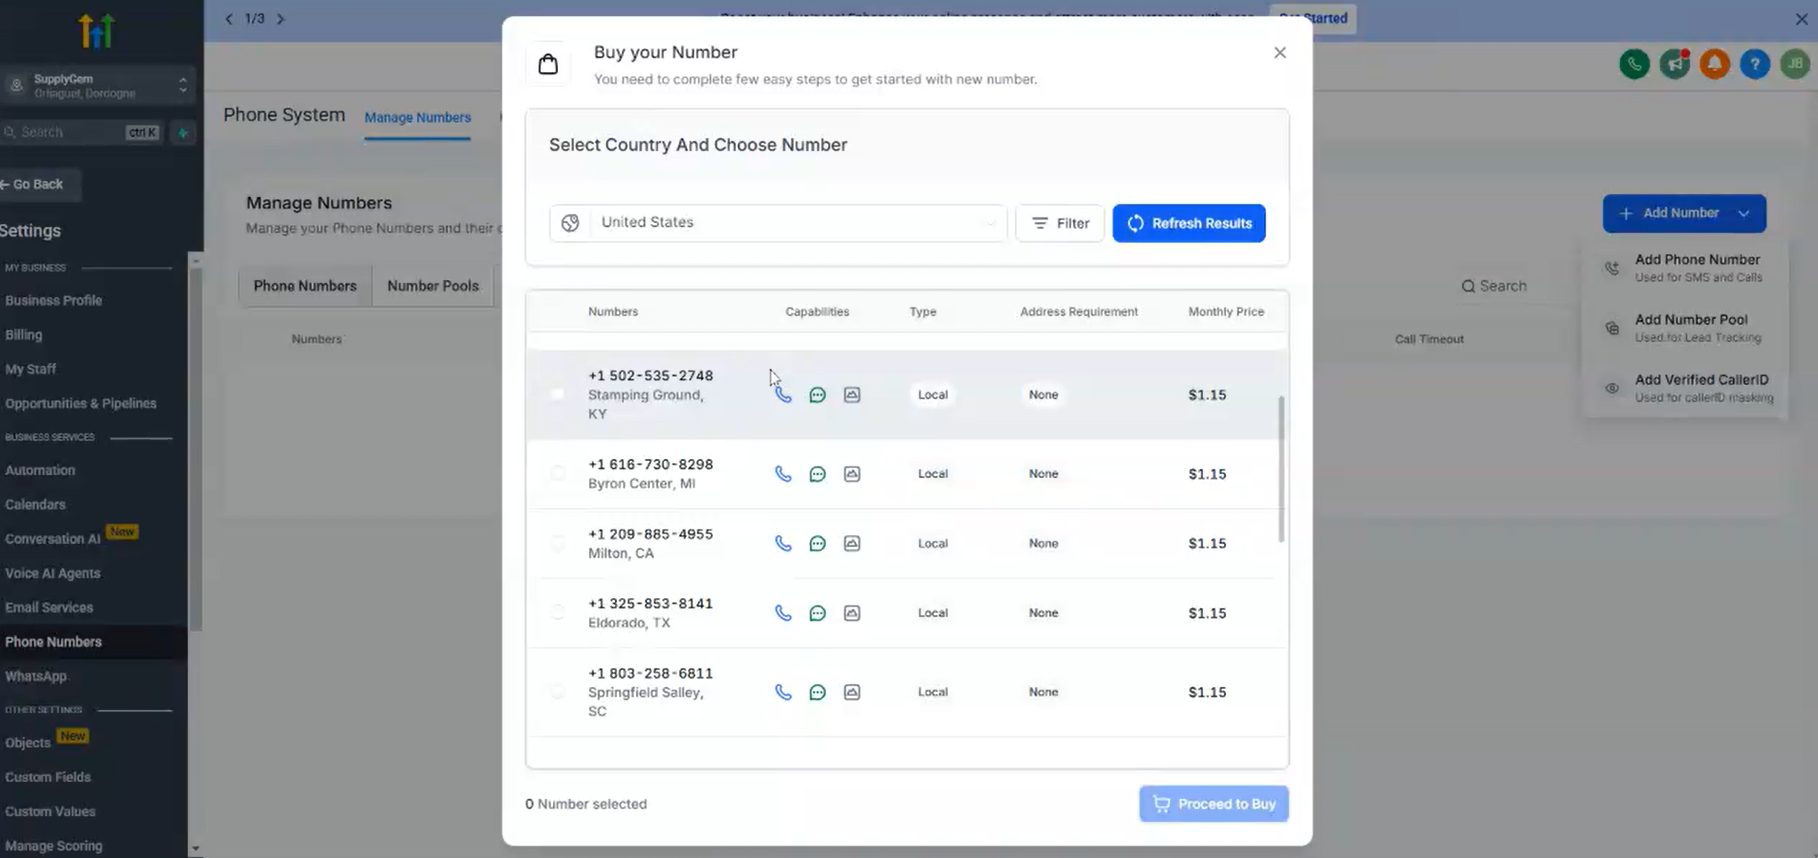
You have a couple of options here. So, check with your client to see which they prefer:
- Toll-Free Numbers: Better for SMS because the approval process for sending them is fast.
- Local Numbers: Slower approval for SMS; however, local numbers are more recognizable and relatable to the business, especially if your client has local customers.
Once you have found a suitable number, click to purchase, and you’re done.
Website Domain
To connect the client’s website domain with GoHighLevel, they will need to give you access to their domain provider account.
Most domain providers have something called Delegate Access, which allows you to get the necessary information without requiring the client’s user name and password.
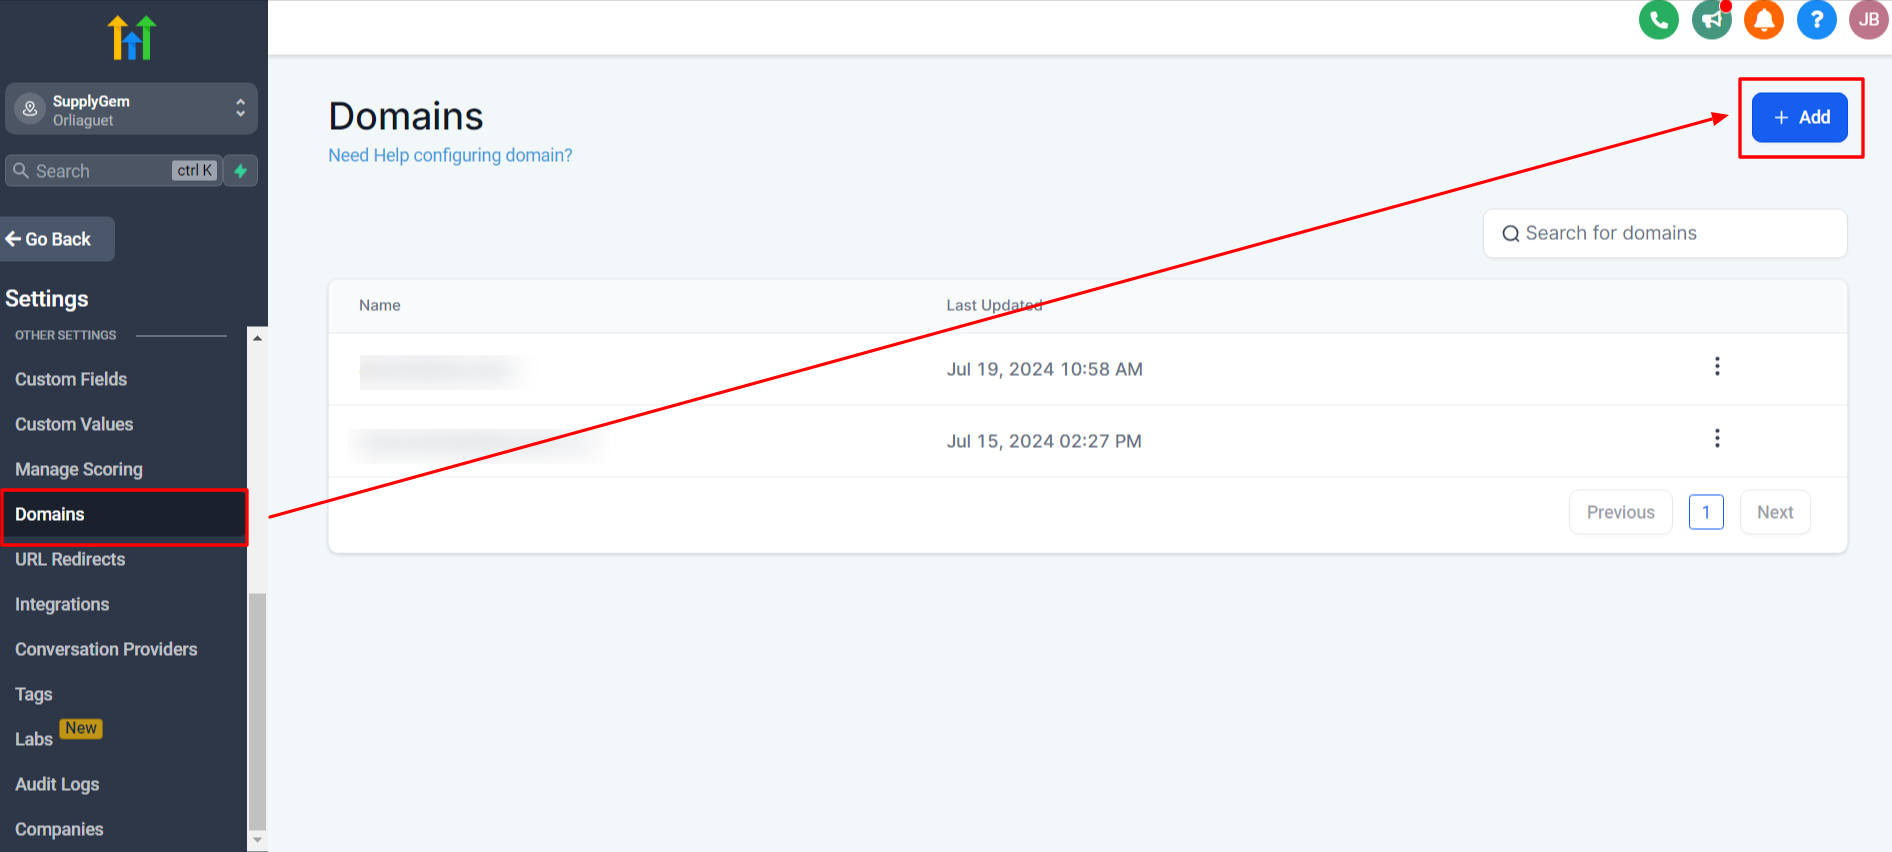
Once you have access, go to the client’s sub-account and click Settings > Domains > +Add.
Follow the on-screen prompts to connect the domain to the sub-account.
Email Settings
There are a few choices regarding emails in GoHighLevel:
- Use LeadConnector (LC Email), which is GoHighLevel’s own SMTP provider.
- Integrate directly with Mailgun.
- Use a client’s own email service provider.
I recommend using LC Email because it saves the complications of connecting multiple apps. If your client is willing, you can migrate them from their current provider to LC Email.
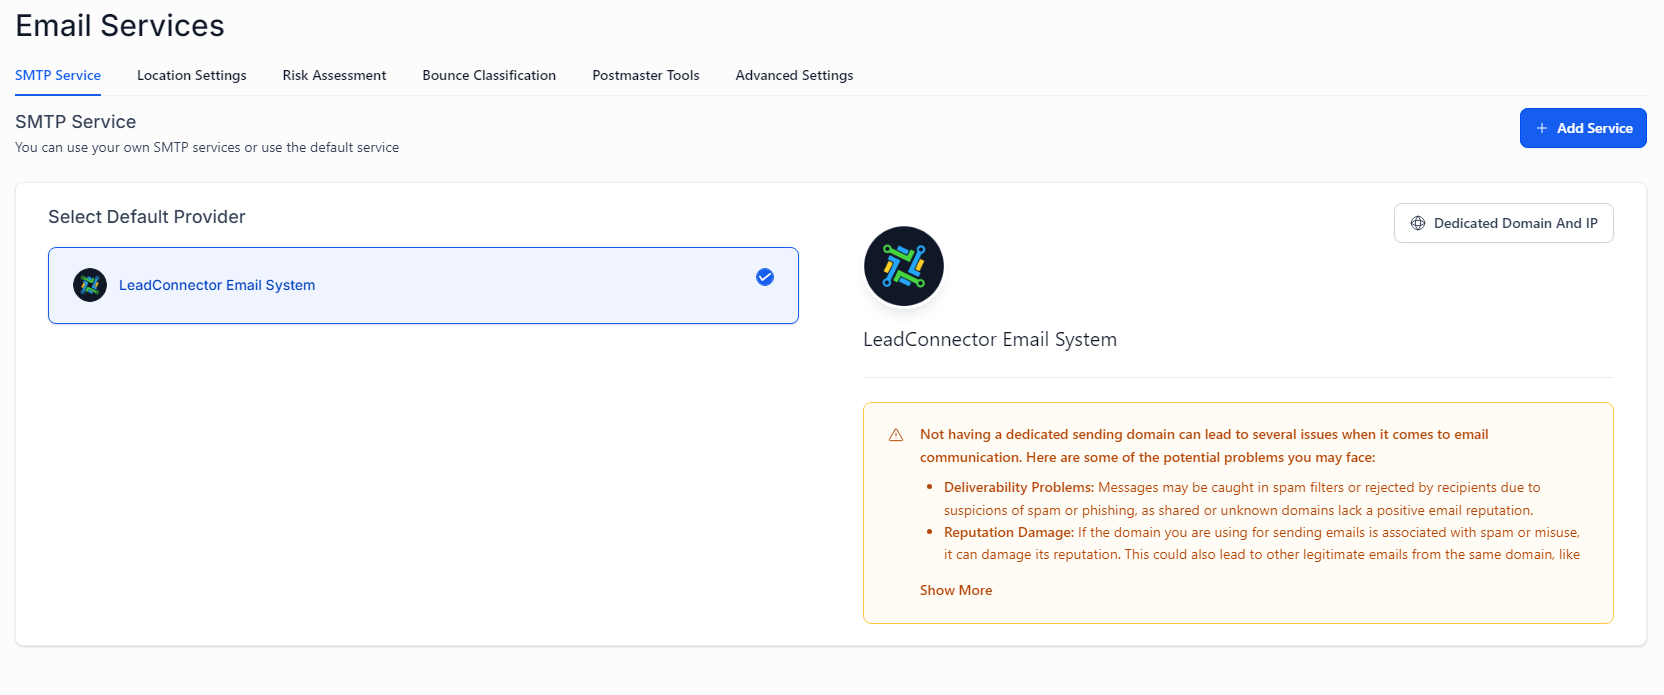
To set up LC Email, head to:
Settings > Email Service > SMTP Service. Then, select LeadConnector Email System as the default provider.
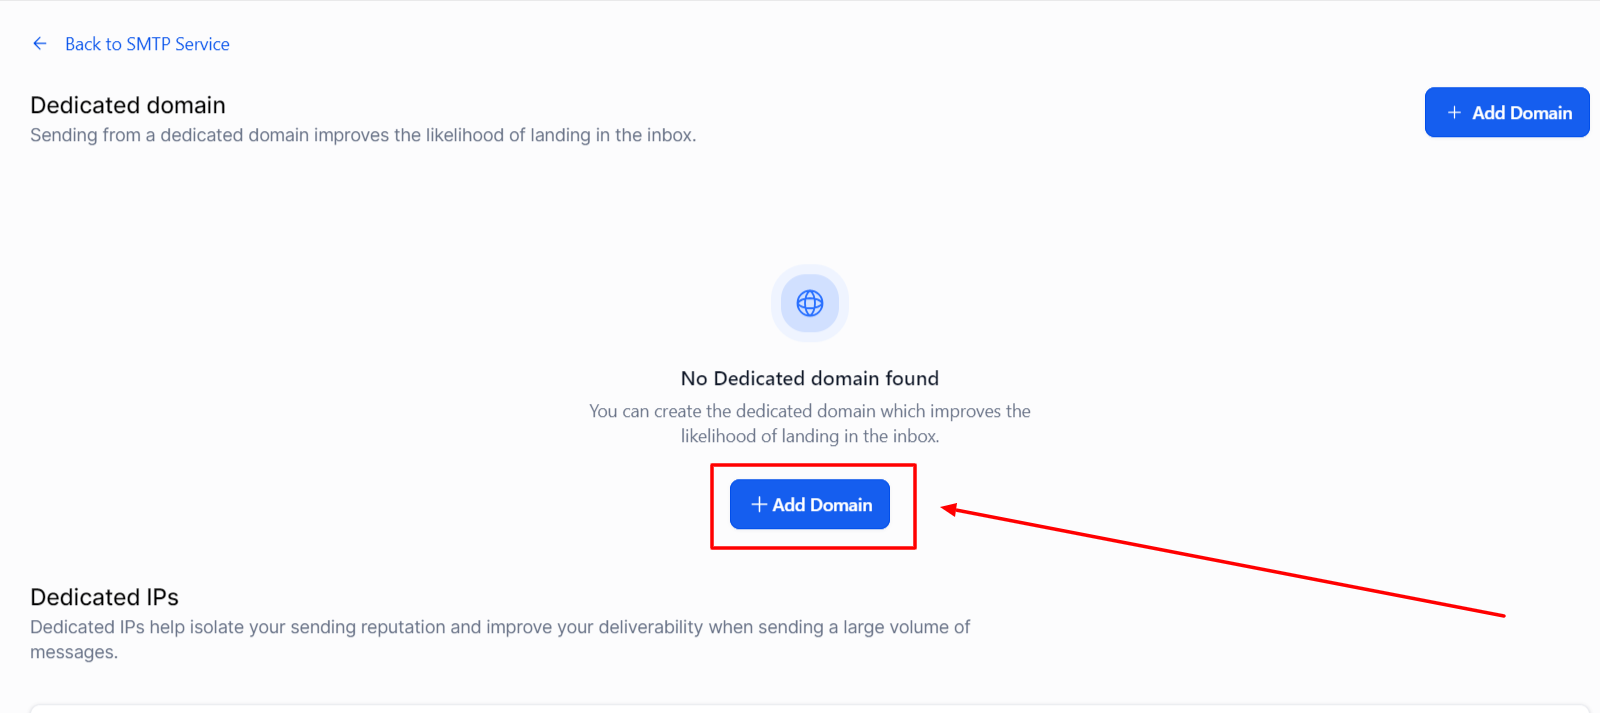
To make full use of GoHighLevel’s emailing features, you will need to add a dedicated domain. To do this, click:
Settings > Email Service > SMTP Service > Dedicated Domains and IP > Add Domain.
Then, you’ll need access to the client’s domain provider so you can add the DNS records and verify the domain is registered to send emails.
5. Connect Social and Google Profiles
The next step is to connect any social media profiles and the client’s Google My Business account.
This is where you’ll need admin access to each account to complete the process.
Once the client has given you access:
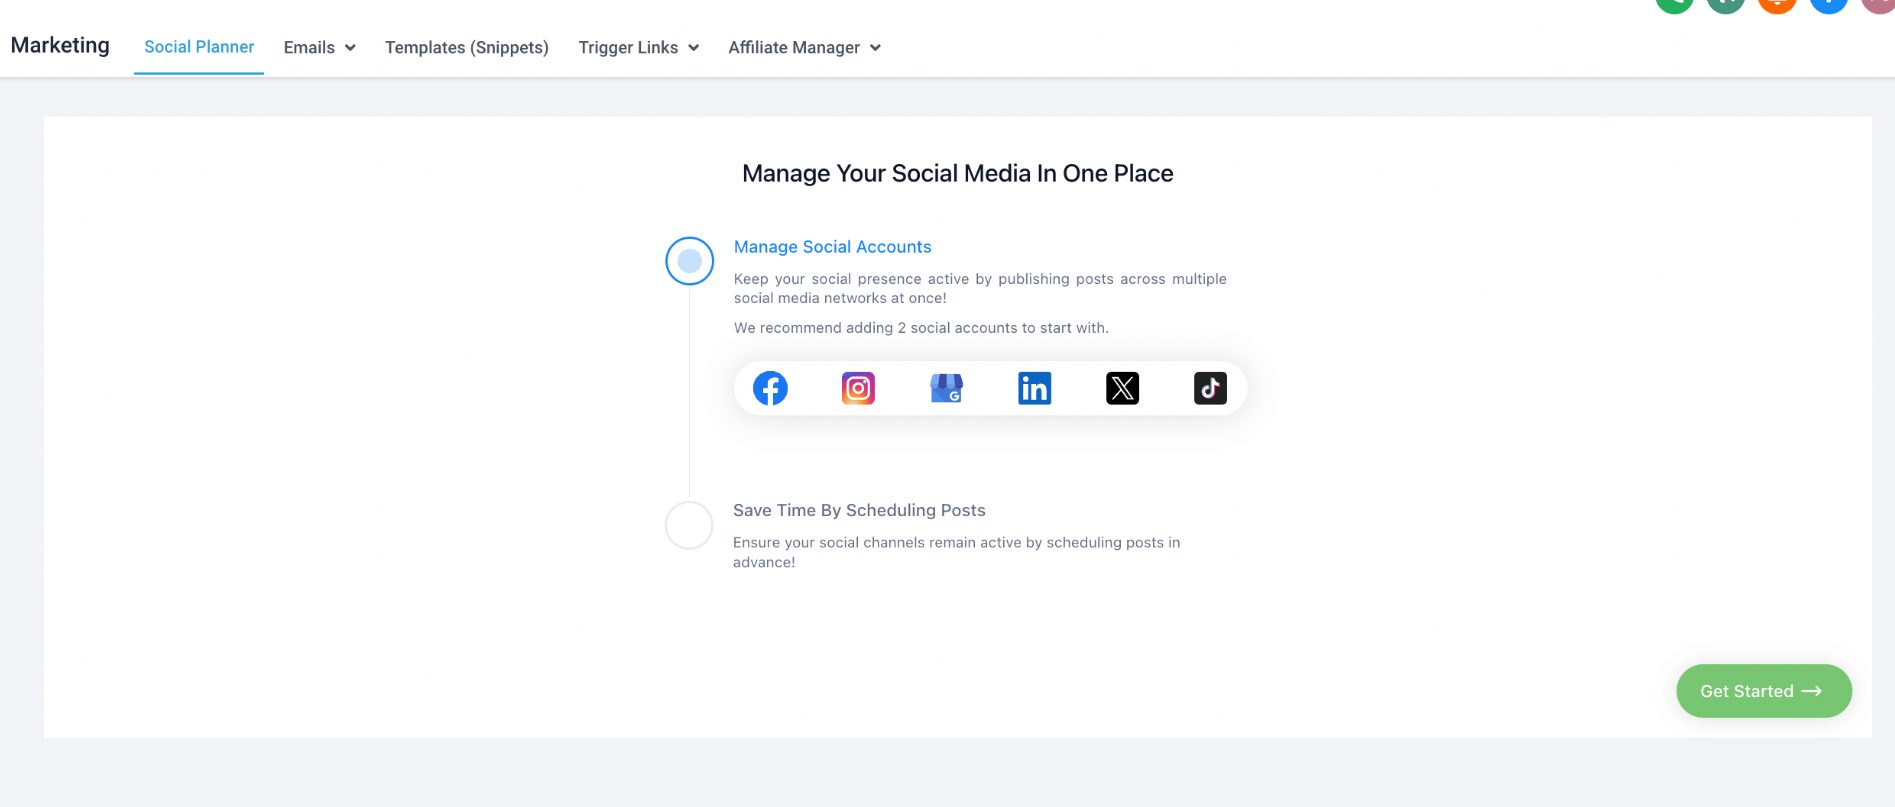
- Head to the client’s sub-account and select Marketing > Social Planner.
- Click to connect an account and follow the setup guidelines. The process differs slightly for each one, but for the most part, it’s pretty straightforward.
- After the accounts have been connected, you or the client can create and schedule posts from within GoHighLevel.
Ad Profiles
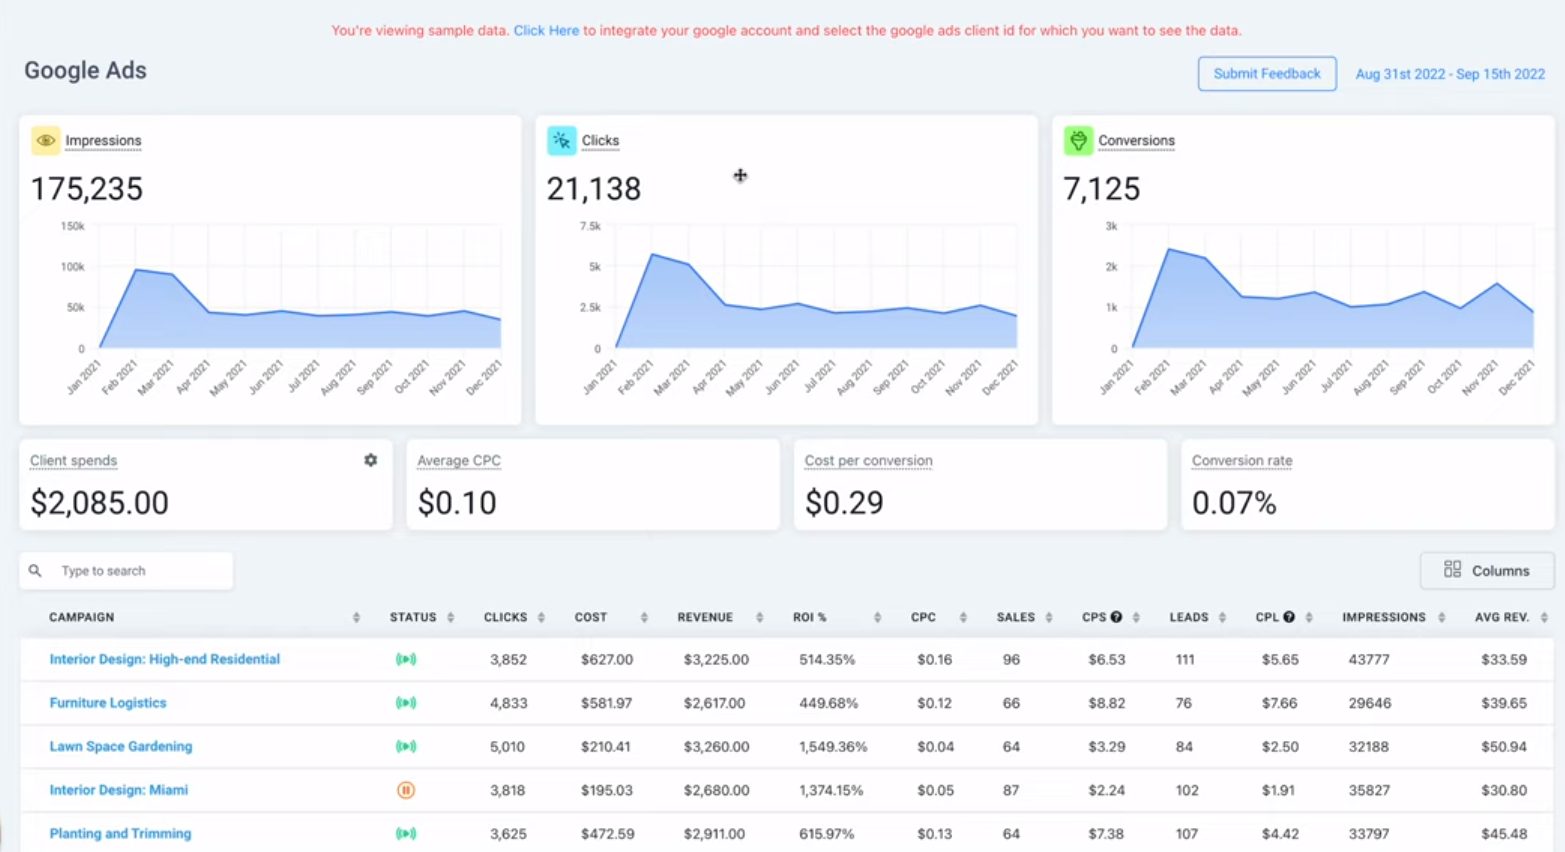
For clients running Google and Meta ads, you’ll also need to connect their ad profiles.
- For Meta, send a friend request to the client’s Facebook business page so they can add you as a user to their Meta Business Suite.
- For Google Ads Manager, the client must log in to their account and add you as a user.
Both setup processes allow you to run campaigns without needing passwords or usernames.
Once you have been added as a user, go to the Integrations tab of the client’s sub-account and follow the process to connect the ad accounts to GoHighLevel.
6. Build Their Calendars, Pipelines, Automations, and Other Assets
At this point, all the necessary cogs are in motion, and you’ll be ready to start building assets on the client’s behalf. For example:
- Set up any calendars according to requirements and availability.
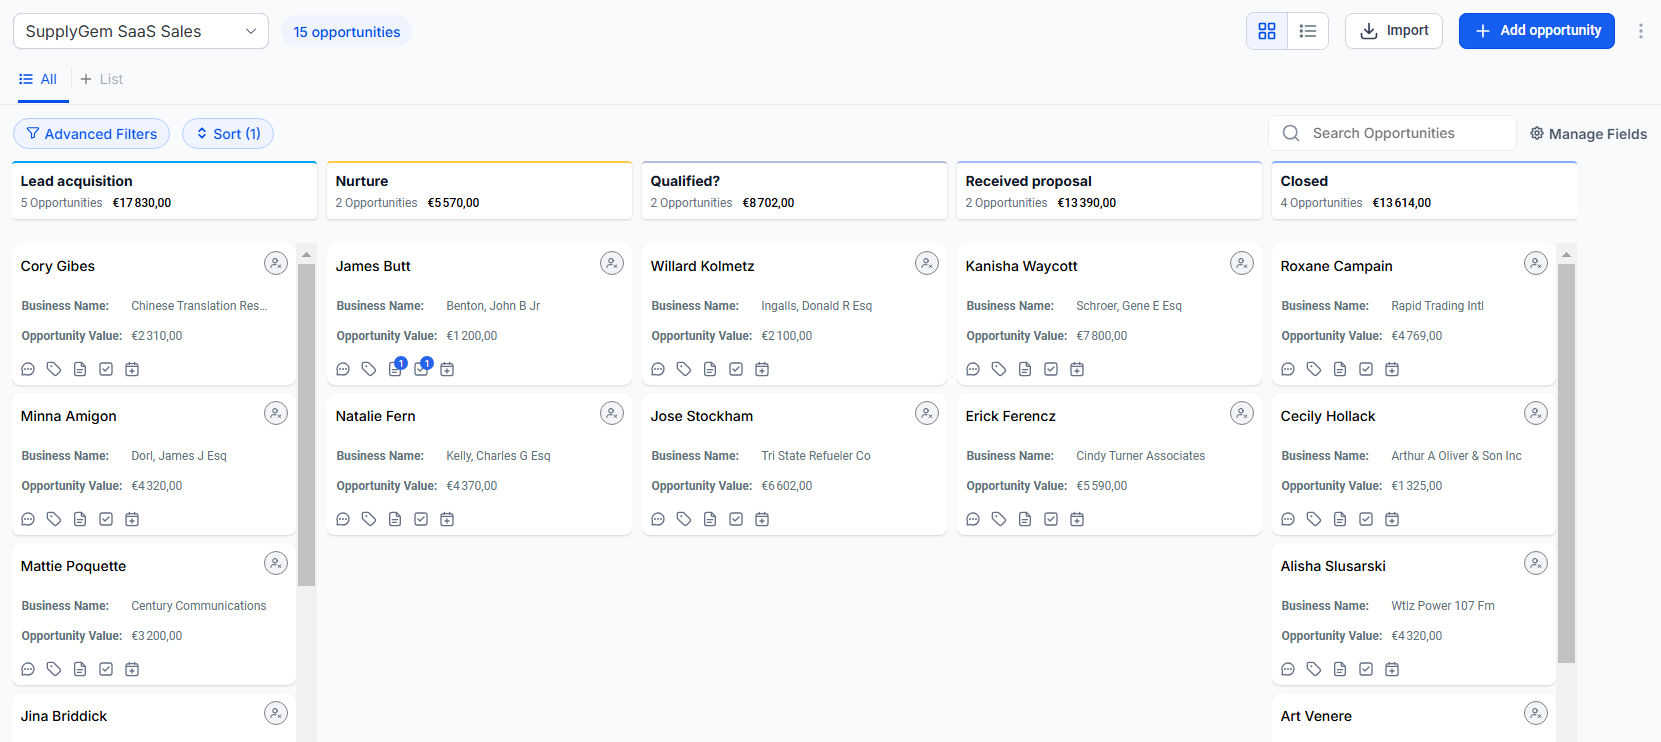
- Discuss pipeline stages with the client and create them accordingly.
- Build custom automations, funnels, and pages for the client’s campaigns.
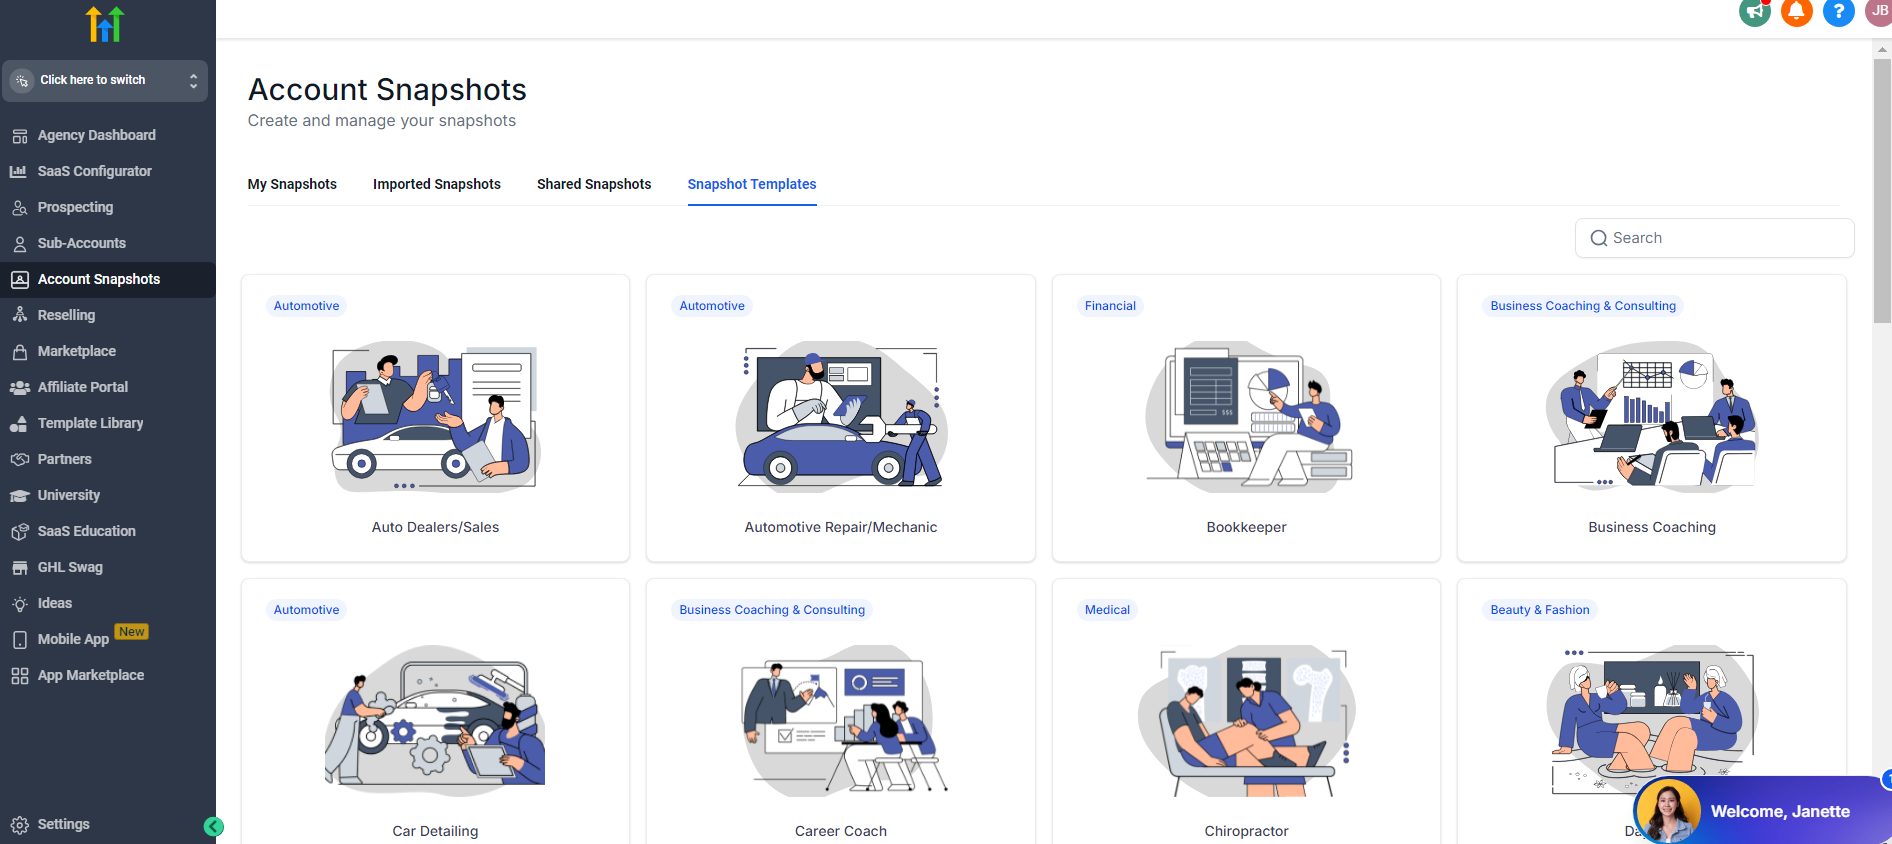
Snapshots are a highly useful tool for this stage. They essentially act as templates, loading the sub-account with standard assets that you can customize and use.
Doing this will save you a ton of time, especially if you are only taking on clients from a specific industry or business niche.
GoHighLevel provides snapshots, but it’s best to create your own according to the packages you offer. Then, you can simply load it into the sub-account when you create it.
7. Give the Client Access
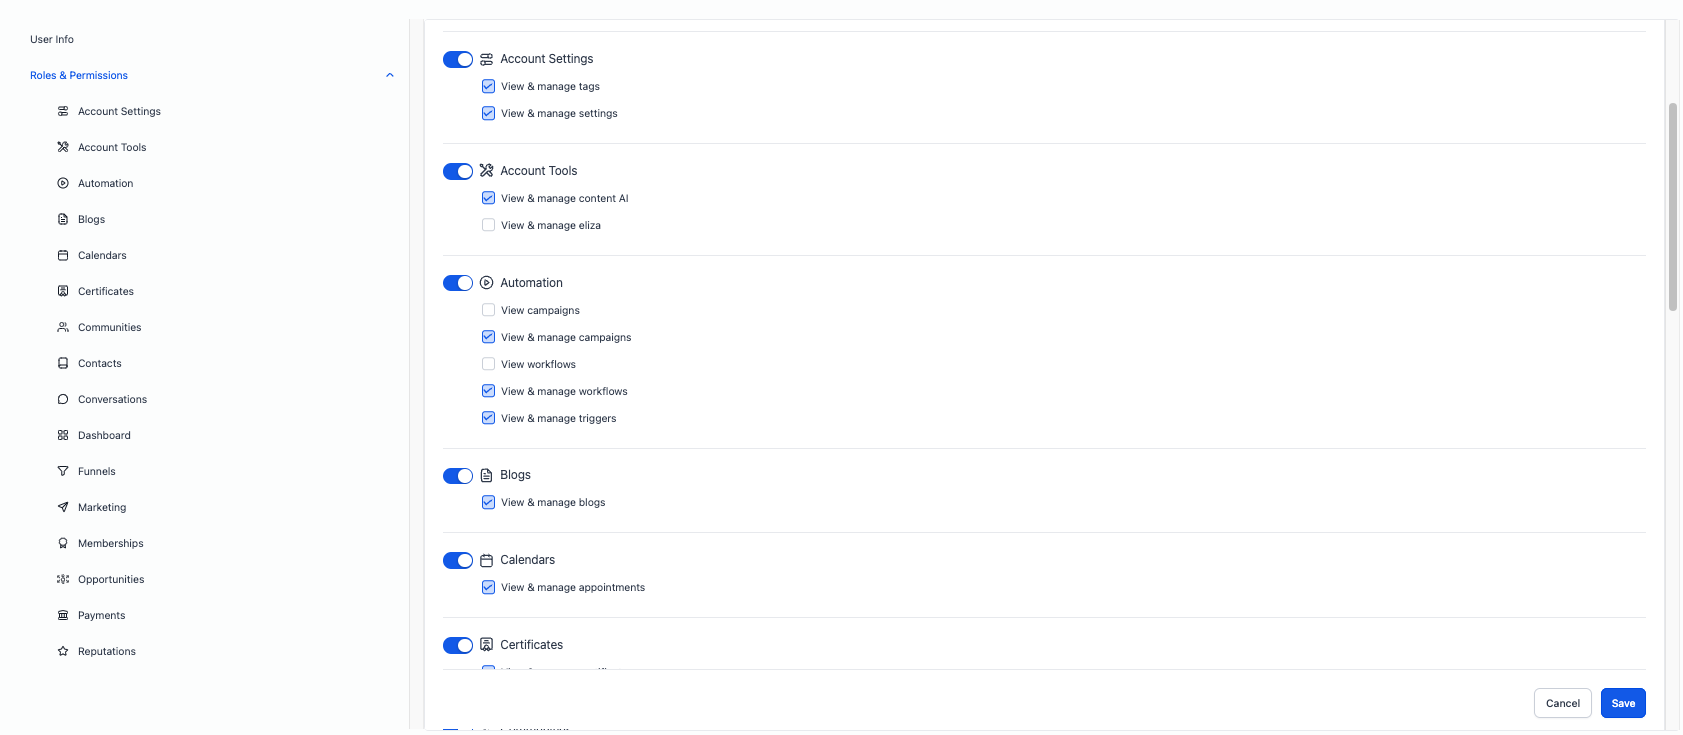
You might want to complete this step earlier, depending on the client’s setup needs. So, whenever you’re ready, you can go ahead and give them access to the sub-account.
Head to your Agency View and click Settings > Team > Add Employee. Complete the user information and set their access privileges.
8. Provide Platform Usage Training

Setting up the client’s sub-account is one thing. Now you have to teach them how to use it.
My preference is to do this over a series of Zoom calls, with each focusing on a specific feature or tool. Doing this breaks everything down nicely and prevents the client from getting overwhelmed.
Be prepared to answer plenty of questions and repeat steps if necessary. Your goal is to ensure the client is fully comfortable and confident when using the platform.
Back up your training with written guides or pre-recorded walkthroughs. So, if you’re not available to take a live call, the client can still access guidance if needed.
9. Troubleshoot and Support
Even with the best onboarding process in the world, there will always be some hiccups and more questions to answer.
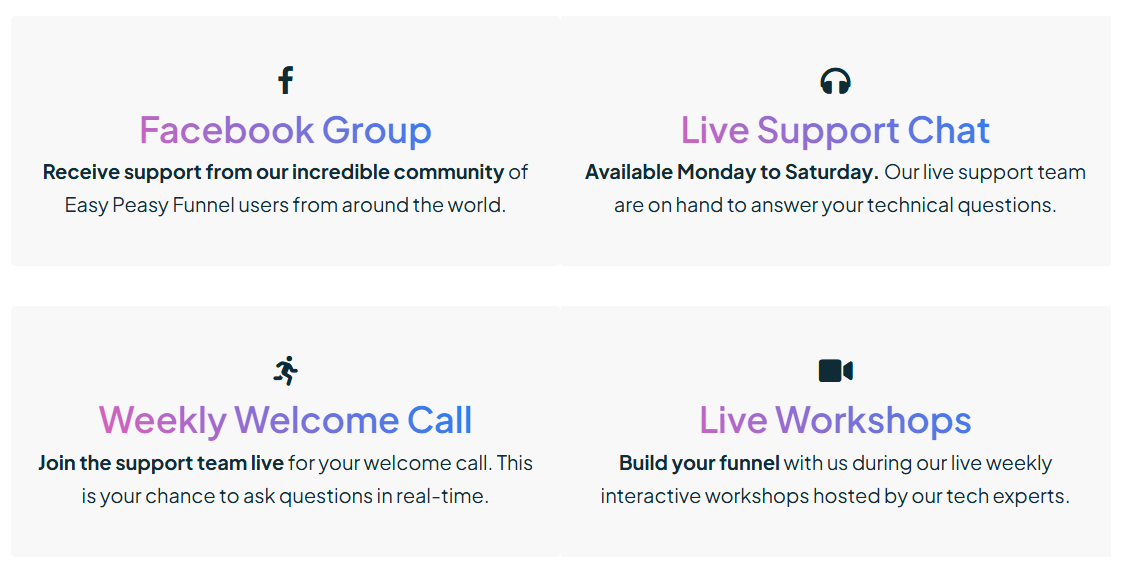
Therefore, you need to implement a system for offering client support:
- Live support is coveted most, and if you offer this, the value of your product will increase substantially.
- Use GoHighLevel’s live chat feature to facilitate text-based support.
- Have a dedicated phone number for support that the client can call.
- Although not live, email ticketing has its uses. Have this available if a client needs to contact you outside of business hours.
Should You Charge for GoHighLevel Client Onboarding?
This question is often asked, and ultimately, it comes down to what you, as the provider, feel most comfortable with.
Many providers include basic onboarding in the price of their packages, with custom or advanced onboarding available as an additional cost.
If you do this, be very clear about which onboarding elements are included and which ones cost more.
For example, a basic package could include sub-account setup and six training sessions. Any additional training calls may incur a cost of $50 each.
The same goes for support.
You could offer standard support as part of the package, but priority support or phone availability could be a premium offering.
Frequently Asked Questions
Does GoHighLevel Provide Client Onboarding?
No, GoHighLevel does not provide client onboarding. It only provides onboarding and support for the agency account owner. So, if you sign up to GoHighLevel and take on clients, GoHighLevel can onboard you but not your clients.
Can I Hire Someone to Provide GoHighLevel Client Onboarding?
Yes, absolutely! You can add another user to your account who can provide onboarding on your behalf. GoHighLevel has a directory of experts who can assist with this, or you can source them from third-party sites or the GoHighLevel Facebook group.